Spring is almost here. The garage smells like motor oil and possibility. But before you roll out of the driveway, take 30 minutes and run through this checklist — your bike (and your body) will thank you.
There's a certain kind of optimism that comes with the first warm weekend of the year. You've been staring at your bike all winter, maybe moving it around the garage a few times just to feel like you're doing something. Now it's finally time.
But winter storage is hard on motorcycles — even when you did everything right. Gaskets dry out. Tires lose pressure. Brake fluid absorbs moisture. Batteries slowly drain. None of these problems will necessarily stop you from leaving the driveway, but they can absolutely hurt you a mile down the road.
This guide walks you through the 10 most important things to check before your first spring ride. Most of these you can knock out in an afternoon, right in your own garage — especially if you have a proper setup that lets you actually get to your bike.
The 10-Point Pre-Season Checklist
1. Battery
This is the most common reason bikes won't start in spring. Even with a battery tender hooked up all winter, older batteries can lose their ability to hold a proper charge. Before you do anything else, test your battery voltage with a multimeter — you're looking for at least 12.6V for a healthy, fully-charged battery. Below 12.4V and you're already losing capacity. Below 12V, plan to replace it before the season starts.
If the voltage looks good, connect the tender and let it run a full charge cycle before you try to start the bike. Don't skip this step just because the battery was fine when you put the bike away in November.
Pro tip: Most auto parts stores will load-test your battery for free. A battery can show acceptable resting voltage but still fail under the actual load of cranking. If your battery is three or more years old, it's worth the test.
2. Tires: Pressure, Cracking & Flat Spots
Cold weather causes tire pressure to drop — roughly 1 PSI for every 10°F change in temperature. A bike that sat all winter on its kickstand likely lost several PSI and developed some degree of flat spotting on the contact patch. Inflate both tires to the manufacturer's spec (found in your owner's manual or on a sticker near the swingarm), then let the bike warm up for a few miles before pushing it hard.
While you're at it, inspect the sidewalls closely for cracking or crazing. Motorcycle tires degrade from UV exposure and ozone even when they're sitting still. If your tires are five or more years old — regardless of tread depth — they should be replaced.
Worth noting: If you stored your bike on the kickstand all winter, the tire bearing weight likely developed a more pronounced flat spot. This usually resolves after 10–15 miles of riding, but it can make the bike feel unusual until it does.
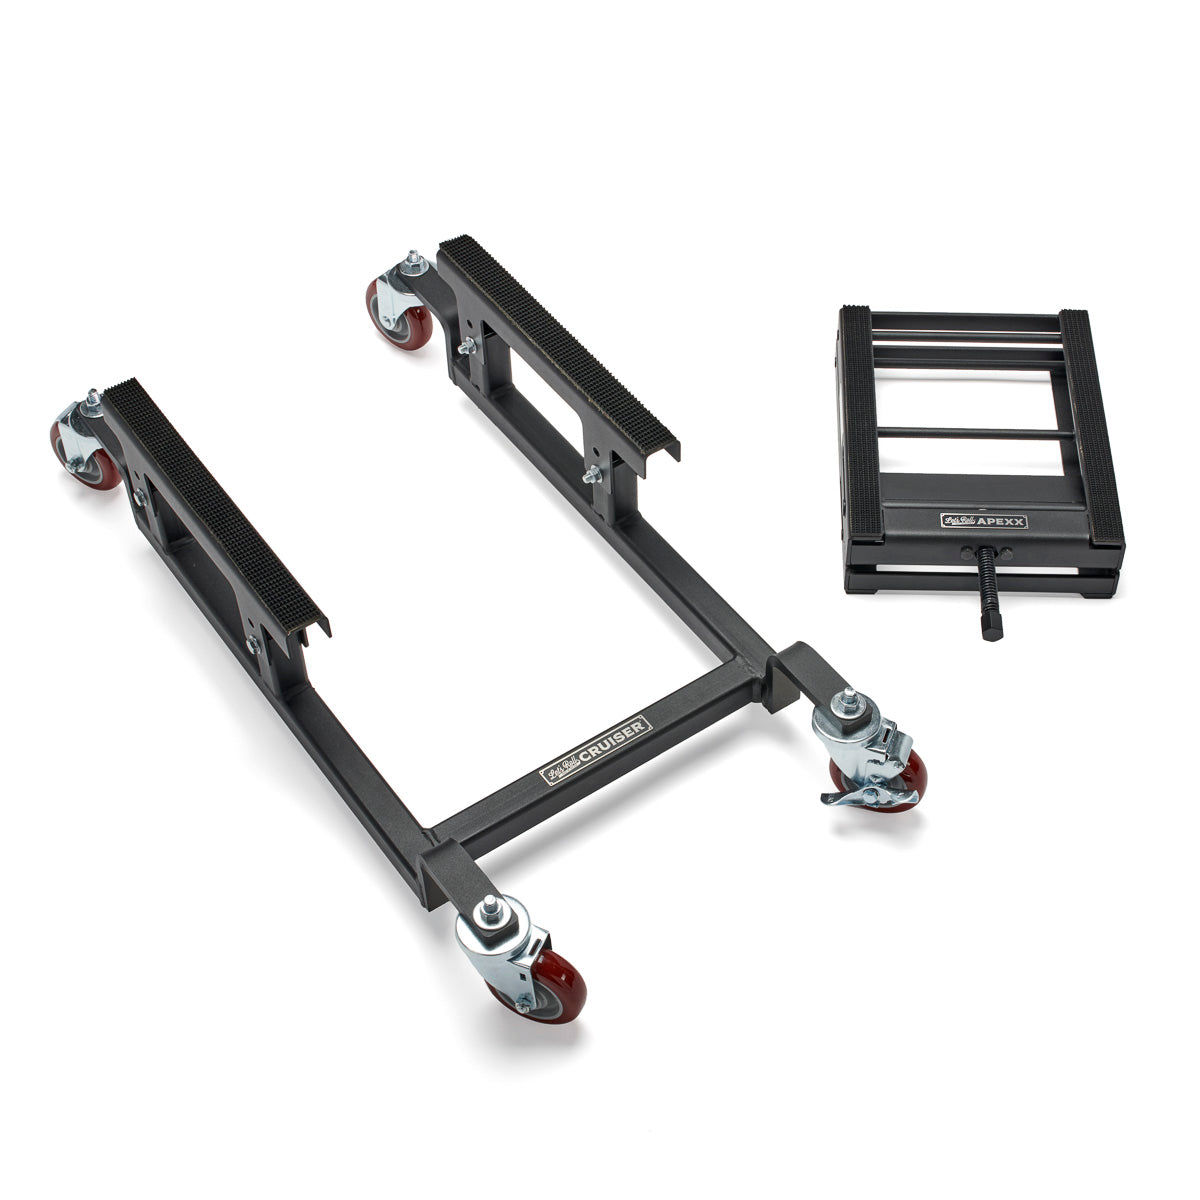
Store Your Bike Off the Kickstand The Let's Roll Cruiser Dolly keeps your bike upright and off the kickstand all winter — eliminating flat spots, relieving stress from the suspension, and making spring prep a whole lot easier. Made in the USA.
3. Engine Oil: Level, Color & Age
If you changed your oil before putting the bike away for winter — good habit. If you didn't, do it now before the first ride. Old oil contains contaminants, combustion byproducts, and moisture that break down its protective properties over time. You wouldn't want to take your engine into a full season on oil that's already degraded.
Pull the dipstick or check the sight glass and look at both the level and the color. Black or very dark brown oil past its interval should be changed. If the level is low, top it off with the correct grade — and don't defer the full change.
Related reading: We covered this in depth — How to Change Your Motorcycle Oil at Home (And Why the Right Setup Makes It Easier).
4. Brakes: Pads, Fluid & Lever Feel
Don't skip this one. Brakes are your most critical safety system and they degrade in storage in ways that aren't always obvious from a quick visual inspection.
Check brake pad thickness on both front and rear — most pads have a wear indicator groove. Check the brake fluid reservoir: fluid should be clear to light yellow and filled to the line. Dark brown or murky fluid means it has absorbed too much moisture and should be flushed. When you squeeze the front brake lever and push the rear pedal, they should feel firm, not spongy. Spongy brakes typically mean air in the lines or degraded fluid.
Test your brakes at low speed in a parking lot before getting onto a real road. Every time.
5. Fuel System: Fuel Quality, Carb or Injectors
If you didn't add fuel stabilizer before storing the bike, you may have an issue. Modern gasoline — especially ethanol-blended fuel — degrades in as little as 30 days. Degraded fuel can varnish carburetors, clog injectors, and cause hard starts, rough idling, and poor performance.
If you're running a carbureted bike and it sat all winter without stabilizer, drain the carb bowl and run fresh fuel through before taking a real ride. Fuel-injected bikes are more forgiving but still benefit from a tank of fresh fuel to dilute anything that settled over the winter. If the bike runs rough at idle or stumbles during acceleration, have the fuel system inspected before putting serious miles on it.
Simple rule: If the fuel in the tank smells sharp or sour — not quite like fresh gas — it's degraded. Drain it and start fresh.
6. Chain or Belt: Tension & Lubrication
An under-lubed chain can stretch, corrode, or snap — and a snapping chain at speed is catastrophic. Check your chain for proper slack (consult your owner's manual — usually 25mm–35mm of free play at the tightest point), look for any stiff or seized links, and check for excessive rust or wear on the sprockets.
If the chain looks dry or lightly rusty, clean it with chain cleaner, let it dry, and apply fresh chain lube. If there's significant rust, kinking, or the sprocket teeth look hooked or worn sharp, plan for a chain and sprocket replacement before you rack up miles.
Belt-drive riders — inspect the belt for cracks, fraying edges, or missing teeth. Belts are more durable than chains but they do wear, and a failed belt on the road leaves you completely stopped.
7. Controls: Throttle, Clutch & Cables
Your throttle should snap back crisply when you release it. Your clutch lever should have proper free play (usually 10–15mm at the lever tip) and engage and disengage cleanly. Run your cables end-to-end, looking for kinking, fraying, or housing that has cracked near the ends.
While you're on the bars, check that your handlebars didn't shift in their clamps over the winter, and that all your controls — switches, mirrors, levers — are tight and positioned where you need them. Small things that feel slightly off in the garage feel much more off when you're moving.
8. Lights, Horn & Electricals
Go through every electrical function on the bike: headlight (high and low), tail light, turn signals front and rear, brake light activated by both the hand lever and foot pedal separately, horn, gauge lighting, and any auxiliary lights or accessories. Bulbs can fail sitting in storage, and wiring connections can corrode over winter — especially if your garage sees humidity swings between seasons.
Check the tail light circuit specifically: Have someone watch from behind while you squeeze the front brake and press the rear pedal separately — both should activate the brake light independently. It's one of the most common overlooked failures.
9. Suspension & Steering
With the bike level and both wheels off the ground, push down on the front forks and let them rebound. They should move smoothly without binding, and rebound without excessive oscillation. Check for oil weeping around the fork seals — a light film of oil or grime around the seals usually means a seal is starting to leak and will get worse with use.
Stand in front of the bike and grab the front wheel — rock it side to side to feel for looseness in the steering head bearings, and push it forward and back to check the wheel bearing. Neither should have any perceptible play. Turn the handlebar lock-to-lock and feel for roughness or stiffness, which can indicate worn or pitted steering head bearings.
Inspect With Both Wheels Off the Ground The Let's Roll Apexx Lift raises your bike from the frame so both wheels hang free — giving you clean, unobstructed access to inspect forks, wheel bearings, and steering head. Up to 1,200 lb capacity. Built in Detroit. See the Apexx Package →
10. A Final Walk-Around: Fasteners, Leaks & the Little Things
Do a slow, methodical walk-around with fresh eyes. Look for any fasteners that have worked loose — engine cases, fender bolts, axle nuts, exhaust clamps. Look under the engine for any fluid that may have pooled or dried. Check your coolant level if you're running a liquid-cooled bike. Look at your fork legs for any scoring or pitting.
Pull your air filter and check its condition — a clogged filter will rob power and fuel economy right from the start of the season. It's an easy swap if it needs it.
Then step back and look at the whole bike. You know your machine. If something looks different from when you put it away, investigate it before you ride it. This final gut-check catches the things the checklist misses.
Your Quick-Reference Pre-Season Checklist
- Battery — voltage test, full charge cycle, replace if 3+ years old
- Tires — inflate to spec, inspect for cracking, check for flat spots
- Engine Oil — check level and color, change if overdue or stored without fresh oil
- Brakes — pad thickness, fluid color and level, lever feel
- Fuel System — fresh fuel, look for varnish signs if no stabilizer was used
- Chain or Belt — tension, lubrication, sprocket or belt wear
- Controls — throttle snap, clutch free play, cable condition
- Lights & Electricals — all lights, horn, brake light both sides
- Suspension & Steering — fork seals, wheel bearings, steering head bearings
- Final Walk-Around — fasteners, leaks, air filter, overall condition
A good pre-season inspection takes less time than you think — and it's always faster than getting stranded, or worse, having to explain to your mechanic how a slow oil leak turned into a seized engine at 65 mph.
Take the 30 minutes. Check the list. Then go enjoy the ride you've been waiting all winter for.
Make Every Inspection Easier The right garage setup makes this whole process faster, safer, and less frustrating. The Let's Roll Apexx Package gives you a lift and a dolly — both made in Detroit — so you can get under your bike, move it where you need it, and store it right all year long. Shop the Apexx Package →